
How to set AWS S3 for React native

I am a full stack developer from Lahore, Pakistan. I'll be writing articles about latest Web technologies and frameworks.
Happy to see you here.
A function to upload images to AWS S3. To use this install the following packages:
Please follow the setup process if not already done
Once done installing the packages let's get our access keys (so that we can access our AWS account) from aws and create a bucket as well while we are at it.
be sure that you are not logged in as a root user
- Click on your username

Then select Access Keys -> Create New Access Key:

After that you can either copy the Access Key ID and Secret Access Key from this window or you can download it as a .CSV file I would suggest to store this file somewhere probably in your project so that we can access it. But it can easily be reproduced.

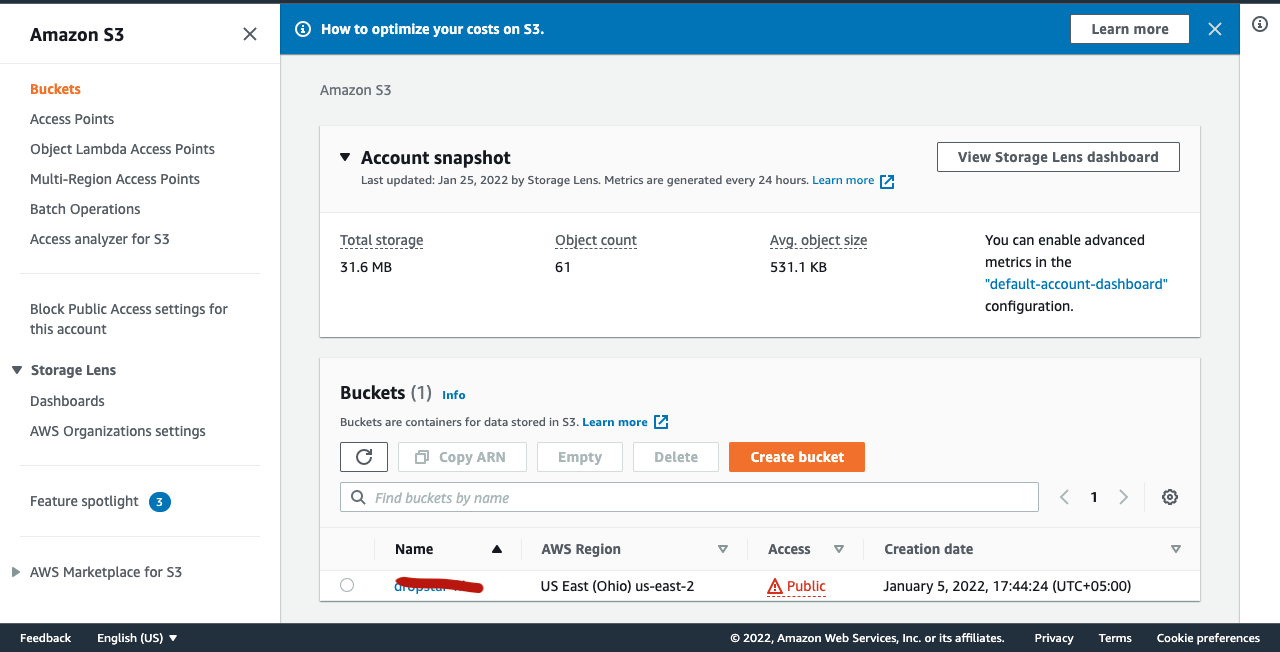
Creating an S3 Bucket
Now let's create an AWS S3 Bucket with proper access. We can do this using the AWS management console or by using Node.js.
To create an S3 bucket using the management console, go to the S3 service by selecting it from the service menu or you can search it as well. 😃

Select "Create Bucket" and enter the name of your bucket and the region that you want to host your bucket. If you already know from which region the majority of your users will come from, it's wise to select a region as close to theirs as possible. This will ensure that the files from the server will be served in a more optimal timeframe.
The name you select for your bucket should be a unique name among all AWS users, so try a new one if the name is not available:

Now you have the Access keys and bucket name So now you can use it in your project 🎊 Congrats! 🎊
Setting up the bucket for public use
Make your S3 bucket public click on edit

unselect everything and click save

Select your Bucket in my case it's dropstar-files.

Click on the permissions tab.
Scroll down you should see Bucket policy click on Edit

Now enter the following code in the section:
{
    "Version": "2012-10-17",
    "Statement": [
        {
            "Sid": "AddPerm",
            "Effect": "Allow",
            "Principal": "*",
            "Action": [
                "s3:PutObject",
                "s3:PutObjectAcl",
                "s3:GetObject"
            ],
            "Resource": "YOUR_ARN_RESOURCE/*"
        }
    ]
}
to get bucket arn copy the following shown in image. and paste it in place of YOUR_ARN_RESOURCE

Save it. Do make sure to have the /* after YOUR_ARN_RESOURCE.
Scroll down you should see Cors edit it and add the following:
[
    {
        "AllowedHeaders": [
            "*"
        ],
        "AllowedMethods": [
            "POST",
            "GET",
            "PUT"
        ],
        "AllowedOrigins": [
            "*"
        ],
        "ExposeHeaders": []
    }
]
Save it. Now you can use the functions mentioned below.
// Import image picker.
import ImagePicker from "react-native-image-crop-picker";

// Import packages for AWS setup.
import S3 from "aws-sdk/clients/s3";
import RNFS from "react-native-fs";
import { decode } from "base64-arraybuffer";

// Function to open camera
const openCamera = () => {
  ImagePicker.openCamera({
    width: 1024,
    height: 1024,
    cropping: true,
  })
    .then((response) => {
      const file = {
        uri: response.path,
        name: `YOUR_PATH/IMAGE_NAME`,
        type: "image/jpeg",
      };
      uploadImageOnS3(file);
    })
    .catch(async (error) => {
      // feel free to add alerts
      console.error("err", error);
    });
};

// Function to open gallery
const openGallery = () => {
  ImagePicker.openPicker({
    width: 1024,
    height: 1024,
    cropping: true,
    mediaType: "photo",
    smartAlbums: ["Favorites", "RecentlyAdded", "UserLibrary"],
  })
    .then((response) => {
      const file = {
        uri: response.path,
        name: `YOUR_PATH/IMAGE_NAME`,
        type: "image/jpeg",
      };
      uploadImageOnS3(file);
    })
    .catch(async (error) => {
      // feel free to add alerts
      console.error("err", error);
    });
};

// Function to upload image to AWS S3 bucket
const uploadImageOnS3 = async (file) => {
  // Initializing a s3 bucket
  const s3bucket = new S3({
    accessKeyId: "YOUR_ACCESS_KEY_ID",
    secretAccessKey: "YOUR_ACCESS_KEY_SECRET",
    Bucket: "YOUR_BUCKET_NAME",
    signatureVersion: "v4",
  });
  let contentType = "image/jpeg";
  let contentDeposition = 'inline;filename="' + file.name + '"';
  const base64 = await RNFS.readFile(file.uri, "base64");
  const arrayBuffer = decode(base64);

  // Creating a s3 bucket
  s3bucket.createBucket(() => {
    const params = {
      Bucket: "YOUR_BUCKET_NAME",
      Key: file.name,
      Body: arrayBuffer,
      ContentDisposition: contentDeposition,
      ContentType: contentType,
    };

    // Uploading image
    s3bucket.upload(params, async (err, data) => {
      if (err) {
        console.log("error in callback");
      }
      console.log("success");
      console.log("Respomse URL : " + data.Location);
    });
  });
};
That's all find more at rayanabid.com